DLP now processes ZIP files using a streaming handler that scans archive contents element-by-element as data arrives. This removes previous file size limitations and improves memory efficiency when scanning large archives.
Microsoft Office documents (DOCX, XLSX, PPTX) also benefit from this improvement, as they use ZIP as a container format.
This improvement is automatic — no configuration changes are required.
ctx.id.jurisdiction inside a Durable Object now reports the jurisdiction the object was created in — for example "eu" when accessed through env.MY_DURABLE_OBJECT.jurisdiction("eu") — so you can make region-aware decisions without passing the jurisdiction through method arguments or persisting it in storage. For the full list of ID-construction paths that preserve jurisdiction, refer to the Durable Object ID documentation.
export class RegionalRoom extends DurableObject { async fetch(request) { // "eu" when accessed through env.MY_DURABLE_OBJECT.jurisdiction("eu") const region = this.ctx.id.jurisdiction; return new Response(`Hello from ${region ?? "the default region"}!`); }}// Workerexport default { async fetch(request, env) { const stub = env.MY_DURABLE_OBJECT.jurisdiction("eu").getByName("general"); return stub.fetch(request); },};
ctx.id.jurisdiction is undefined for Durable Objects that were not created in a jurisdiction-restricted namespace. Alarms scheduled before 2026-03-15 also do not have jurisdiction stored; to backfill the value, reschedule the alarm from a fetch() or RPC handler.
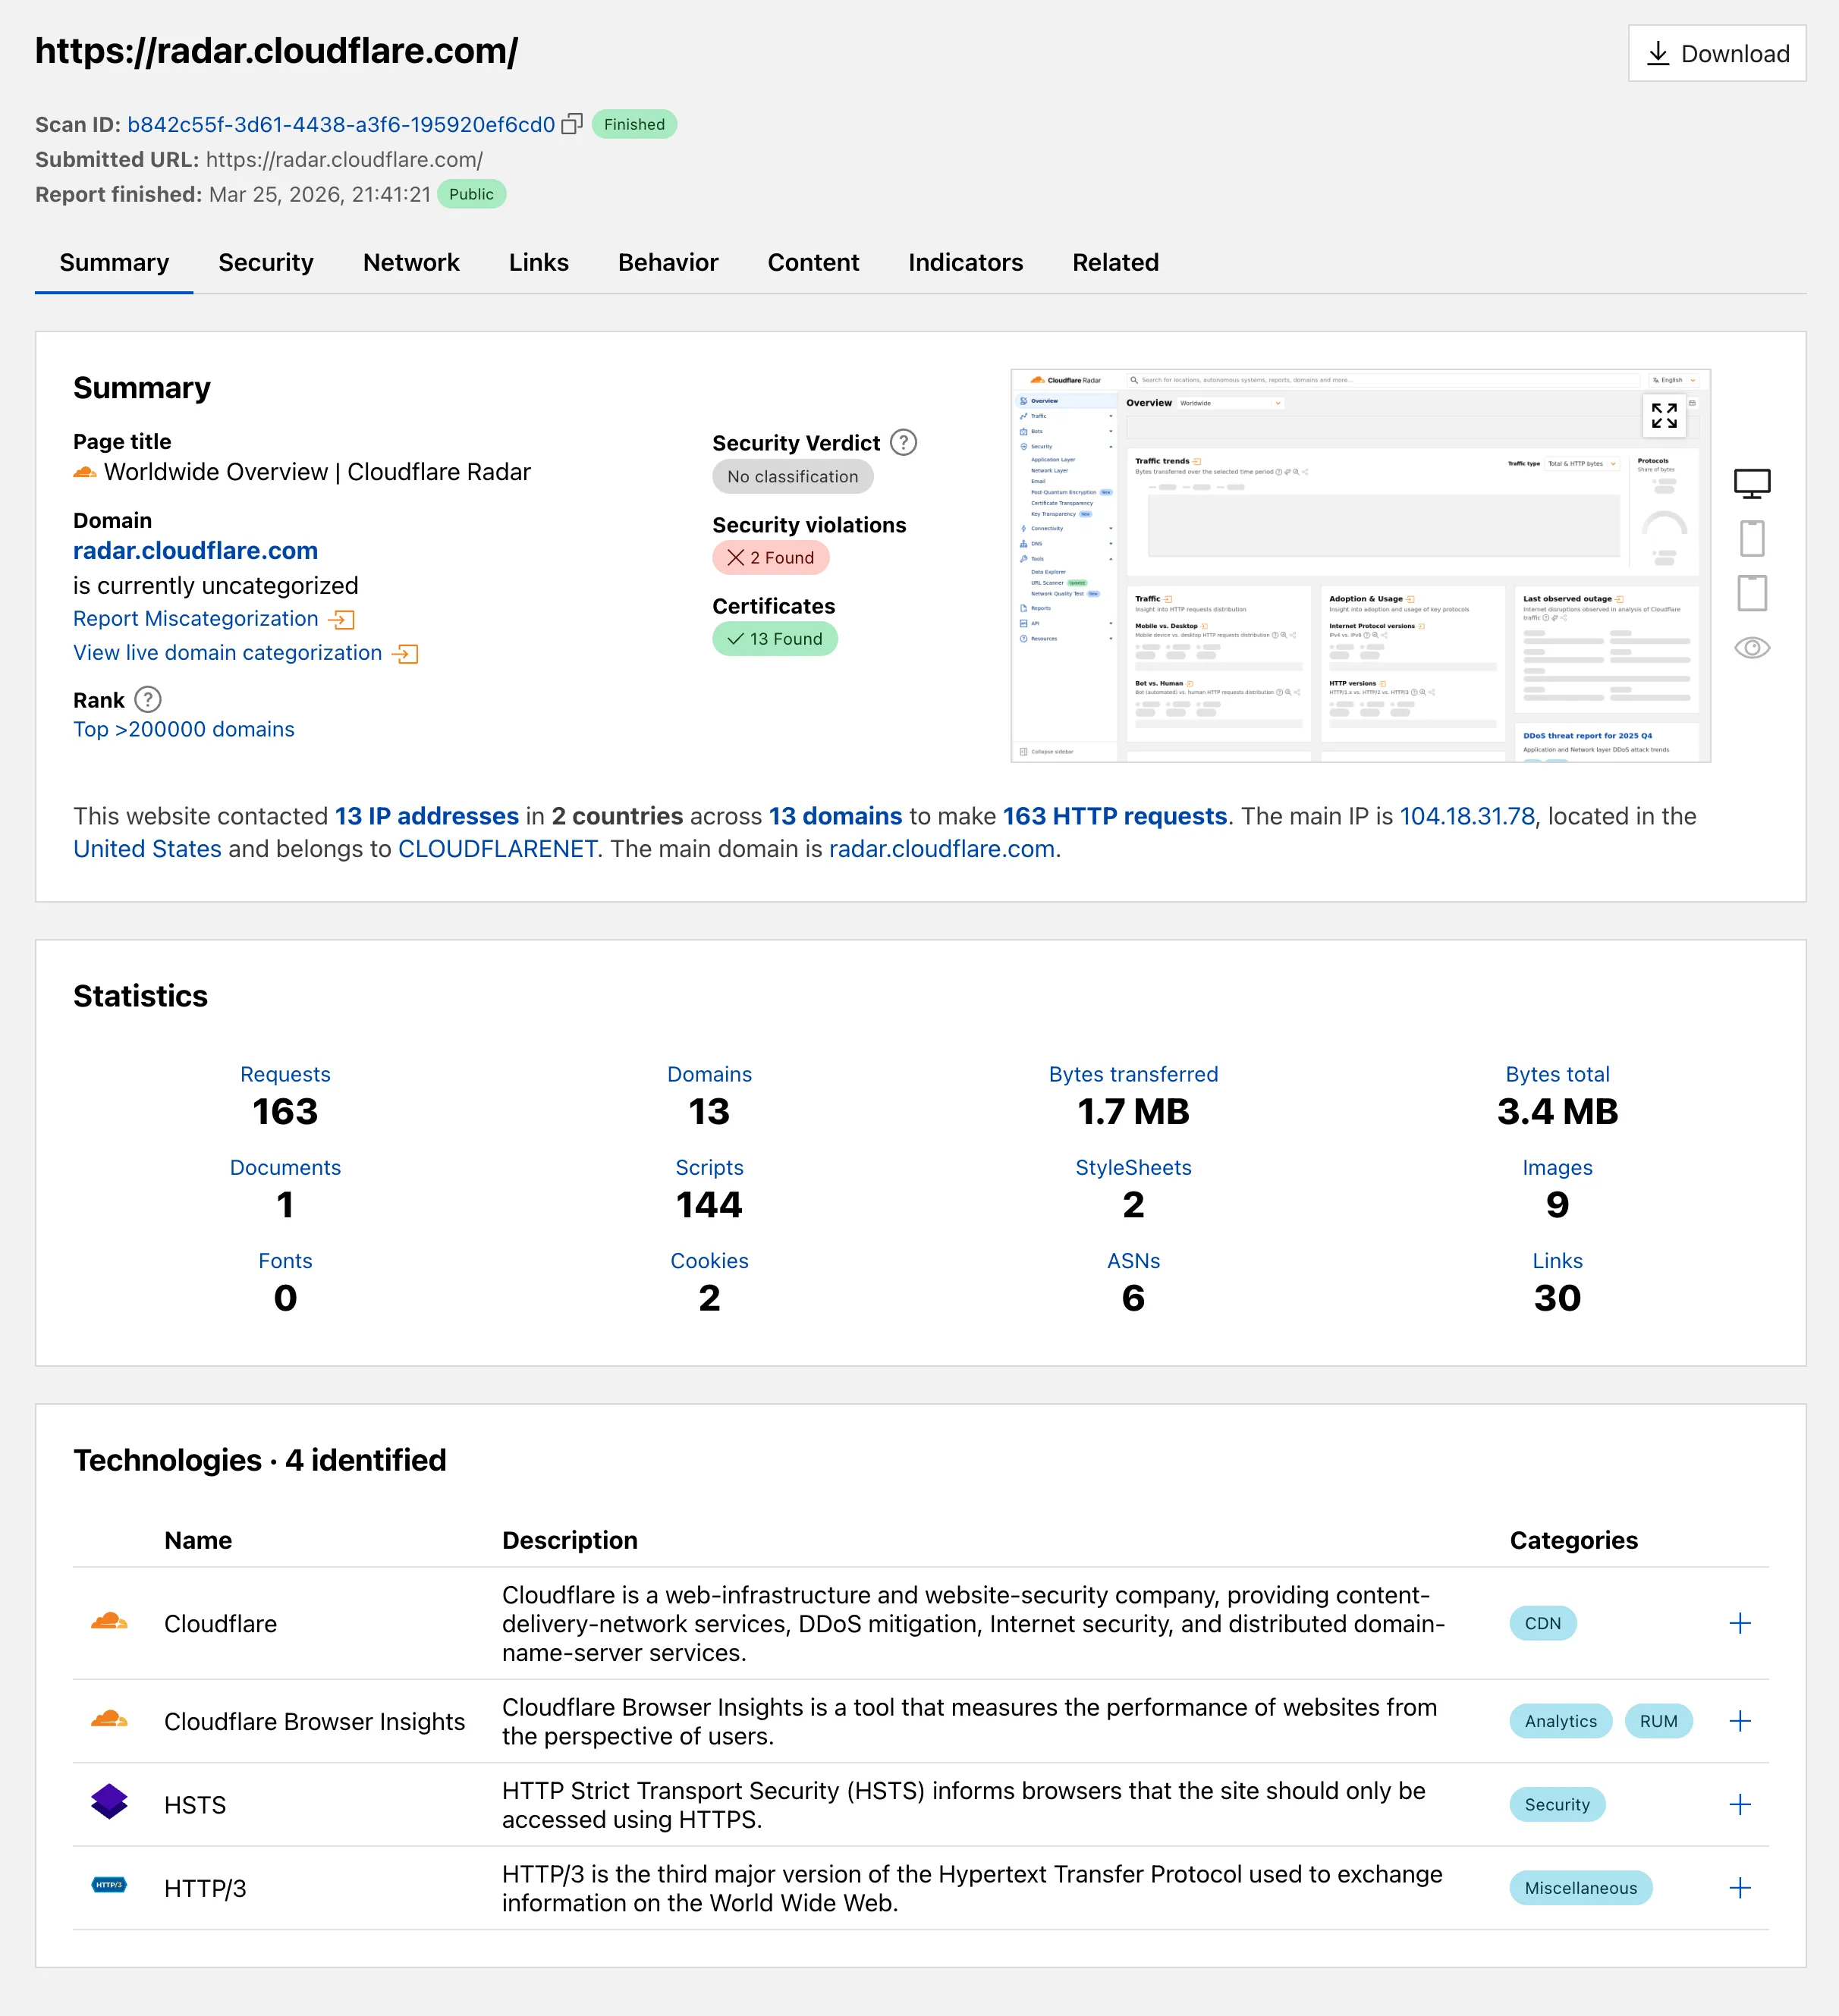
Radar ships several improvements to the URL Scanner ↗ that make scan reports more informative and easier to share:
Live screenshots — the summary card now includes an option to capture a live screenshot of the scanned URL on demand using the Browser Rendering API.
Save as PDF — a new button generates a print-optimized document aggregating all tab contents (Summary, Security, Network, Behavior, and Indicators) into a single file.
Download as JSON — raw scan data is available as a JSON download for programmatic use.
Redesigned summary layout — page information and security details are now displayed side by side with the screenshot, with a layout that adapts to narrower viewports.
File downloads — downloads are separated into a dedicated card with expandable rows showing each file's source URL and SHA256 hash.
Detailed IP address data — the Network tab now includes additional detail per IP address observed during the scan.
HTTP Archive (HAR) files are used by engineering and support teams to capture and share web traffic logs for troubleshooting. However, these files routinely contain highly sensitive data — including session cookies, authorization headers, and other credentials — that can pose a significant risk if uploaded to third-party services without being reviewed or cleaned first.
Gateway now includes a predefined DLP profile called Unsanitized HAR that detects HAR files in HTTP traffic. You can use this profile in a Gateway HTTP policy to either block HAR file uploads entirely or redirect users to a sanitization tool before allowing the upload to proceed.
How to configure a HAR file policy
In the Cloudflare dashboard ↗, go to Zero Trust > Traffic policies > Firewall Policies > HTTP and create a new HTTP policy using the DLP Profile selector:
Selector
Operator
Value
Action
DLP Profile
in
Unsanitized HAR
Then choose one of the following actions:
Block: Prevents the upload of any HAR file that has not been sanitized by Cloudflare's sanitizer. Use this for strict environments where HAR file sharing must be disallowed entirely.
Block with Gateway Redirect: Intercepts the upload and redirects the user to https://har-sanitizer.pages.dev/, where they can sanitize the file. Once sanitized, the user can re-upload the clean file and proceed with their workflow.
Sanitized HAR recognition
HAR files processed by the Cloudflare HAR sanitizer receive a tamper-evident sanitized marker. DLP recognizes this marker and will not re-trigger the policy on a file that has already been sanitized and has not been modified since. If a previously sanitized file is edited, it will be treated as unsanitized and flagged again.
Visibility in Gateway logs
Gateway logs will reflect whether a detected HAR file was classified as Unsanitized or Sanitized, giving your security team full visibility into HAR file activity across your organization.
Logpush now supports higher-precision timestamp formats for log output. You can configure jobs to output timestamps at millisecond or nanosecond precision. This is available in both the Logpush UI in the Cloudflare dashboard and the Logpush API.
To use the new formats, set timestamp_format in your Logpush job's output_options:
rfc3339ms — 2024-02-17T23:52:01.123Z
rfc3339ns — 2024-02-17T23:52:01.123456789Z
Default timestamp formats apply unless explicitly set. The dashboard defaults to rfc3339 and the API defaults to unixnano.
Cloudflare now exposes four new fields in the Transform Rules phase that encode client certificate data in RFC 9440 ↗ format. Previously, forwarding client certificate information to your origin required custom parsing of PEM-encoded fields or non-standard HTTP header formats. These new fields produce output in the standardized Client-Cert and Client-Cert-Chain header format defined by RFC 9440, so your origin can consume them directly without any additional decoding logic.
Each certificate is DER-encoded, Base64-encoded, and wrapped in colons. For example, :MIIDsT...Vw==:. A chain of intermediates is expressed as a comma-separated list of such values.
New fields
Field
Type
Description
cf.tls_client_auth.cert_rfc9440
String
The client leaf certificate in RFC 9440 format. Empty if no client certificate was presented.
cf.tls_client_auth.cert_rfc9440_too_large
Boolean
true if the leaf certificate exceeded 10 KB and was omitted. In practice this will almost always be false.
cf.tls_client_auth.cert_chain_rfc9440
String
The intermediate certificate chain in RFC 9440 format as a comma-separated list. Empty if no intermediate certificates were sent or if the chain exceeded 16 KB.
cf.tls_client_auth.cert_chain_rfc9440_too_large
Boolean
true if the intermediate chain exceeded 16 KB and was omitted.
The chain encoding follows the same ordering as the TLS handshake: the certificate closest to the leaf appears first, working up toward the trust anchor. The root certificate is not included.
Example: Forwarding client certificate headers to your origin server
Add a request header transform rule to set the Client-Cert and Client-Cert-Chain headers on requests forwarded to your origin server. For example, to forward headers for verified, non-revoked certificates:
Rule expression:
cf.tls_client_auth.cert_verified and not cf.tls_client_auth.cert_revoked
Header modifications:
Operation
Header name
Value
Set
Client-Cert
cf.tls_client_auth.cert_rfc9440
Set
Client-Cert-Chain
cf.tls_client_auth.cert_chain_rfc9440
To get the most out of these fields, upload your client CA certificate to Cloudflare so that Cloudflare validates the client certificate at the edge and populates cf.tls_client_auth.cert_verified and cf.tls_client_auth.cert_revoked.
The new secrets configuration property lets you declare the secret names your Worker requires in your Wrangler configuration file. Required secrets are validated during local development and deploy, and used as the source of truth for type generation.
When secrets is defined, wrangler dev and vite dev load only the keys listed in secrets.required from .dev.vars or .env/process.env. Additional keys in those files are excluded. If any required secrets are missing, a warning is logged listing the missing names.
Type generation
wrangler types generates typed bindings from secrets.required instead of inferring names from .dev.vars or .env. This lets you run type generation in CI or other environments where those files are not present. Per-environment secrets are supported — the aggregated Env type marks secrets that only appear in some environments as optional.
Deploy
wrangler deploy and wrangler versions upload validate that all secrets in secrets.required are configured on the Worker before the operation succeeds. If any required secrets are missing, the command fails with an error listing which secrets need to be set.
AI Crawl Control now supports extending the underlying WAF rule with custom modifications. Any changes you make directly in the WAF custom rules editor — such as adding path-based exceptions, extra user agents, or additional expression clauses — are preserved when you update crawler actions in AI Crawl Control.
If the WAF rule expression has been modified in a way AI Crawl Control cannot parse, a warning banner appears on the Crawlers page with a link to view the rule directly in WAF.
You can now control how Cloudflare handles origin responses without changing your origin. Cache Response Rules let you modify Cache-Control directives, manage cache tags, and strip headers like Set-Cookie from origin responses before they reach Cloudflare's cache. Whether traffic is cached or passed through dynamically, these rules give you control over origin response behavior that was previously out of reach.
What changed
Cache Rules previously only operated on request attributes. Cache Response Rules introduce a new response phase that evaluates origin responses and lets you act on them before caching. You can now:
Modify Cache-Control directives: Set or remove individual directives like no-store, no-cache, max-age, s-maxage, stale-while-revalidate, immutable, and more. For example, remove a no-cache directive your origin sends so Cloudflare can cache the asset, or set an s-maxage to control how long Cloudflare stores it.
Set a different browser Cache-Control: Send a different Cache-Control header downstream to browsers and other clients than what Cloudflare uses internally, giving you independent control over edge and browser caching strategies.
Manage cache tags: Add, set, or remove cache tags on responses, including converting tags from another CDN's header format into Cloudflare's Cache-Tag header. This is especially useful if you are migrating from a CDN that uses a different tag header or delimiter.
Strip headers that block caching: Remove Set-Cookie, ETag, or Last-Modified headers from origin responses before caching, so responses that would otherwise be treated as uncacheable can be stored and served from cache.
Benefits
No origin changes required: Fix caching behavior entirely from Cloudflare, even when your origin configuration is locked down or managed by a different team.
Simpler CDN migration: Match caching behavior from other CDN providers without rewriting your origin. Translate cache tag formats and override directives that do not align with Cloudflare's defaults.
Native support, fewer workarounds: Functionality that previously required workarounds is now built into Cache Rules with full Tiered Cache compatibility.
Fine-grained control: Use expressions to match on request and response attributes, then apply precise cache settings per rule. Rules are stackable and composable with existing Cache Rules.
Containers now support Docker Hub ↗ images. You can use a fully qualified Docker Hub image reference in your Wrangler configuration ↗ instead of first pushing the image to Cloudflare Registry.
Cloudflare Gateway now supports OIDC Claims as a selector in Firewall, Resolver, and Egress policies. Administrators can use custom OIDC claims from their identity provider to build fine-grained, identity-based traffic policies across all Gateway policy types.
With this update, you can:
Filter traffic in DNS, HTTP, and Network firewall policies based on OIDC claim values.
Apply custom resolver policies to route DNS queries to specific resolvers depending on a user's OIDC claims.
Control egress policies to assign dedicated egress IPs based on OIDC claim attributes.
For example, you can create a policy that routes traffic differently for users with department=engineering in their OIDC claims, or restrict access to certain destinations based on a user's role claim.
To get started, configure custom OIDC claims on your identity provider and use the OIDC Claims selector in the Gateway policy builder.
Dynamic Workers are now in open beta ↗ for all paid Workers users. You can now have a Worker spin up other Workers, called Dynamic Workers, at runtime to execute code on-demand in a secure, sandboxed environment. Dynamic Workers start in milliseconds, making them well suited for fast, secure code execution at scale.
Use Dynamic Workers for
Code Mode: LLMs are trained to write code. Run tool-calling logic written in code instead of stepping through many tool calls, which can save up to 80% in inference tokens and cost.
AI agents executing code: Run code for tasks like data analysis, file transformation, API calls, and chained actions.
Running AI-generated code: Run generated code for prototypes, projects, and automations in a secure, isolated sandboxed environment.
Fast development and previews: Load prototypes, previews, and playgrounds in milliseconds.
Custom automations: Create custom tools on the fly that execute a task, call an integration, or automate a workflow.
Executing Dynamic Workers
Dynamic Workers support two loading modes:
load(code) — for one-time code execution (equivalent to calling get() with a null ID).
get(id, callback) — caches a Dynamic Worker by ID so it can stay warm across requests. Use this when the same code will receive subsequent requests.
export default { async fetch(request, env) { const worker = env.LOADER.load({ compatibilityDate: "2026-01-01", mainModule: "src/index.js", modules: { "src/index.js": ` export default { fetch() { return new Response("Hello from a dynamic Worker"); }, }; `, }, // Block all outbound network access from the Dynamic Worker. globalOutbound: null, }); return worker.getEntrypoint().fetch(request); },};
export default { async fetch(request: Request, env: Env): Promise<Response> { const worker = env.LOADER.load({ compatibilityDate: "2026-01-01", mainModule: "src/index.js", modules: { "src/index.js": ` export default { fetch() { return new Response("Hello from a dynamic Worker"); }, }; `, }, // Block all outbound network access from the Dynamic Worker. globalOutbound: null, }); return worker.getEntrypoint().fetch(request); },};
Helper libraries for Dynamic Workers
Here are 3 new libraries to help you build with Dynamic Workers:
@cloudflare/codemode ↗: Replace individual tool calls with a single code() tool, so LLMs write and execute TypeScript that orchestrates multiple API calls in one pass.
@cloudflare/worker-bundler ↗: Resolve npm dependencies and bundle source files into ready-to-load modules for Dynamic Workers, all at runtime.
@cloudflare/shell ↗: Give your agent a virtual filesystem inside a Dynamic Worker with persistent storage backed by SQLite and R2.
Try it out
Dynamic Workers Starter
Use this starter ↗ to deploy a Worker that can load and execute Dynamic Workers.
Dynamic Workers Playground
Deploy the Dynamic Workers Playground ↗ to write or import code, bundle it at runtime with @cloudflare/worker-bundler, execute it through a Dynamic Worker, and see real-time responses and execution logs.
Dynamic Workers pricing is based on three dimensions: Dynamic Workers created daily, requests, and CPU time.
Included
Additional usage
Dynamic Workers created daily
1,000 unique Dynamic Workers per month
+$0.002 per Dynamic Worker per day
Requests ¹
10 million per month
+$0.30 per million requests
CPU time ¹
30 million CPU milliseconds per month
+$0.02 per million CPU milliseconds
¹ Uses Workers Standard rates and will appear as part of your existing Workers bill, not as separate Dynamic Workers charges.
Note: Dynamic Workers requests and CPU time are already billed as part of your Workers plan and will count toward your Workers requests and CPU usage. The Dynamic Workers created daily charge is not yet active — you will not be billed for the number of Dynamic Workers created at this time. Pricing information is shared in advance so you can estimate future costs.
The latest release of the Agents SDK ↗ exposes agent state as a readable property, prevents duplicate schedule rows across Durable Object restarts, brings full TypeScript inference to AgentClient, and migrates to Zod 4.
Readable state on useAgent and AgentClient
Both useAgent (React) and AgentClient (vanilla JS) now expose a state property that reflects the current agent state. Previously, reading state required manually tracking it through the onStateUpdate callback.
React (useAgent)
const agent = useAgent({ agent: "game-agent", name: "room-123",});// Read state directly — no separate useState + onStateUpdate neededreturn <div>Score: {agent.state?.score}</div>;// Spread for partial updatesagent.setState({ ...agent.state, score: (agent.state?.score ?? 0) + 10 });
const agent = useAgent<GameAgent, GameState>({ agent: "game-agent", name: "room-123",});// Read state directly — no separate useState + onStateUpdate neededreturn <div>Score: {agent.state?.score}</div>;// Spread for partial updatesagent.setState({ ...agent.state, score: (agent.state?.score ?? 0) + 10 });
agent.state is reactive — the component re-renders when state changes from either the server or a client-side setState() call.
State starts as undefined and is populated when the server sends the initial state on connect (from initialState) or when setState() is called. Use optional chaining (agent.state?.field) for safe access. The onStateUpdate callback continues to work as before — the new state property is additive.
Idempotent schedule()
schedule() now supports an idempotent option that deduplicates by (type, callback, payload), preventing duplicate rows from accumulating when called in places that run on every Durable Object restart such as onStart().
Cron schedules are idempotent by default. Calling schedule("0 * * * *", "tick") multiple times with the same callback, expression, and payload returns the existing schedule row instead of creating a new one. Pass { idempotent: false } to override.
Delayed and date-scheduled types support opt-in idempotency:
import { Agent } from "agents";class MyAgent extends Agent { async onStart() { // Safe across restarts — only one row is created await this.schedule(60, "maintenance", undefined, { idempotent: true }); }}
import { Agent } from "agents";class MyAgent extends Agent { async onStart() { // Safe across restarts — only one row is created await this.schedule(60, "maintenance", undefined, { idempotent: true }); }}
Two new warnings help catch common foot-guns:
Calling schedule() inside onStart() without { idempotent: true } emits a console.warn with actionable guidance (once per callback; skipped for cron and when idempotent is set explicitly).
If an alarm cycle processes 10 or more stale one-shot rows for the same callback, the SDK emits a console.warn and a schedule:duplicate_warning diagnostics channel event.
Typed AgentClient with call inference and stub proxy
AgentClient now accepts an optional agent type parameter for full type inference on RPC calls, matching the typed experience already available with useAgent.
const client = new AgentClient({ agent: "my-agent", host: window.location.host,});// Typed call — method name autocompletes, args and return type inferredconst value = await client.call("getValue");// Typed stub — direct RPC-style proxyawait client.stub.getValue();await client.stub.add(1, 2);
const client = new AgentClient<MyAgent>({ agent: "my-agent", host: window.location.host,});// Typed call — method name autocompletes, args and return type inferredconst value = await client.call("getValue");// Typed stub — direct RPC-style proxyawait client.stub.getValue();await client.stub.add(1, 2);
State is automatically inferred from the agent type, so onStateUpdate is also typed:
const client = new AgentClient({ agent: "my-agent", host: window.location.host, onStateUpdate: (state) => { // state is typed as MyAgent's state type },});
const client = new AgentClient<MyAgent>({ agent: "my-agent", host: window.location.host, onStateUpdate: (state) => { // state is typed as MyAgent's state type },});
Existing untyped usage continues to work without changes. The RPC type utilities (AgentMethods, AgentStub, RPCMethods) are now exported from agents/client for advanced typing scenarios.
agents, @cloudflare/ai-chat, and @cloudflare/codemode now require zod ^4.0.0. Zod v3 is no longer supported.
@cloudflare/ai-chat fixes
Turn serialization — onChatMessage() and _reply() work is now queued so user requests, tool continuations, and saveMessages() never stream concurrently.
Duplicate messages on stop — Clicking stop during an active stream no longer splits the assistant message into two entries.
Duplicate messages after tool calls — Orphaned client IDs no longer leak into persistent storage.
keepAlive() and keepAliveWhile() are no longer experimental
keepAlive() now uses a lightweight in-memory ref count instead of schedule rows. Multiple concurrent callers share a single alarm cycle. The @experimental tag has been removed from both keepAlive() and keepAliveWhile().
@cloudflare/codemode: TanStack AI integration
A new entry point @cloudflare/codemode/tanstack-ai adds support for TanStack AI's ↗chat() as an alternative to the Vercel AI SDK's streamText():
AI Search now offers new REST API endpoints for search and chat that use an OpenAI compatible format. This means you can use the familiar messages array structure that works with existing OpenAI SDKs and tools. The messages array also lets you pass previous messages within a session, so the model can maintain context across multiple turns.
Endpoint
Path
Chat Completions
POST /accounts/{account_id}/ai-search/instances/{name}/chat/completions
Search
POST /accounts/{account_id}/ai-search/instances/{name}/search
Here is an example request to the Chat Completions endpoint using the new messages array format:
curl https://api.cloudflare.com/client/v4/accounts/{ACCOUNT_ID}/ai-search/instances/{NAME}/chat/completions \
  -H "Content-Type: application/json" \
  -H "Authorization: Bearer {API_TOKEN}" \
  -d '{
    "messages": [
      {
        "role": "system",
        "content": "You are a helpful documentation assistant."
      },
      {
        "role": "user",
        "content": "How do I get started?"
      }
    ]
  }'
If you are using the previous AutoRAG API endpoints (/autorag/rags/), we recommend migrating to the new endpoints. The previous AutoRAG API endpoints will continue to be fully supported.
Select your instance, and turn on Public Endpoint in Settings.
For more details, refer to Public endpoint configuration.
UI snippets
UI snippets are pre-built search and chat components you can embed in your website. Visit search.ai.cloudflare.com ↗ to configure and preview components for your AI Search instance.
AI Search now supports custom metadata filtering, allowing you to define your own metadata fields and filter search results based on attributes like category, version, or any custom field you define.
Define a custom metadata schema
You can define up to 5 custom metadata fields per AI Search instance. Each field has a name and data type (text, number, or boolean):
Two new fields are now available in the httpRequestsAdaptive and httpRequestsAdaptiveGroupsGraphQL Analytics API datasets:
webAssetsOperationId — the ID of the saved endpoint that matched the incoming request.
webAssetsLabelsManaged — the managed labels mapped to the matched operation at the time of the request (for example, cf-llm, cf-log-in). At most 10 labels are returned per request.
Both fields are empty when no operation matched. webAssetsLabelsManaged is also empty when no managed labels are assigned to the matched operation.
These fields allow you to determine, per request, which Web Assets operation was matched and which managed labels were active. This is useful for troubleshooting downstream security detection verdicts — for example, understanding why AI Security for Apps did or did not flag a request.
R2 SQL now supports an expanded SQL grammar so you can write richer analytical queries without exporting data. This release adds CASE expressions, column aliases, arithmetic in clauses, 163 scalar functions, 33 aggregate functions, EXPLAIN, Common Table Expressions (CTEs),and full struct/array/map access. R2 SQL is Cloudflare's serverless, distributed, analytics query engine for querying Apache Iceberg ↗ tables stored in R2 Data Catalog. This page documents the supported SQL syntax.
Highlights
Column aliases — SELECT col AS alias now works in all clauses
CASE expressions — conditional logic directly in SQL (searched and simple forms)
Scalar functions — 163 new functions across math, string, datetime, regex, crypto, encoding, and type inspection categories
Aggregate functions — statistical (variance, stddev, correlation, regression), bitwise, boolean, and positional aggregates join the existing basic and approximate functions
Complex types — query struct fields with bracket notation, use 46 array functions, and extract map keys/values
Common table expressions (CTEs) — use WITH ... AS to define named temporary result sets. Chained CTEs are supported. All CTEs must reference the same single table.
Full expression support — arithmetic, type casting (CAST, TRY_CAST, :: shorthand), and EXTRACT in SELECT, WHERE, GROUP BY, HAVING, and ORDER BY
Examples
CASE expressions with statistical aggregates
SELECT source, CASE WHEN AVG(price) > 30 THEN 'premium' WHEN AVG(price) > 10 THEN 'mid-tier' ELSE 'budget' END AS tier, round(stddev(price), 2) AS price_volatility, approx_percentile_cont(price, 0.95) AS p95_priceFROM my_namespace.sales_dataGROUP BY source
Struct and array access
SELECT product_name, pricing['price'] AS price, array_to_string(tags, ', ') AS tag_listFROM my_namespace.productsWHERE array_has(tags, 'Action')ORDER BY pricing['price'] DESCLIMIT 10
Chained CTEs with time-series analysis
WITH monthly AS ( SELECT date_trunc('month', sale_timestamp) AS month, department, COUNT(*) AS transactions, round(AVG(total_amount), 2) AS avg_amount FROM my_namespace.sales_data WHERE sale_timestamp BETWEEN '2025-01-01T00:00:00Z' AND '2025-12-31T23:59:59Z' GROUP BY date_trunc('month', sale_timestamp), department),ranked AS ( SELECT month, department, transactions, avg_amount, CASE WHEN avg_amount > 1000 THEN 'high-value' WHEN avg_amount > 500 THEN 'mid-value' ELSE 'standard' END AS tier FROM monthly WHERE transactions > 100)SELECT * FROM rankedORDER BY month, avg_amount DESC
This rule has been merged into the original rule "PHP, vBulletin, jQuery File Upload - Code Injection, Dangerous File Upload - CVE:CVE-2018-9206, CVE:CVE-2019-17132" (ID: )
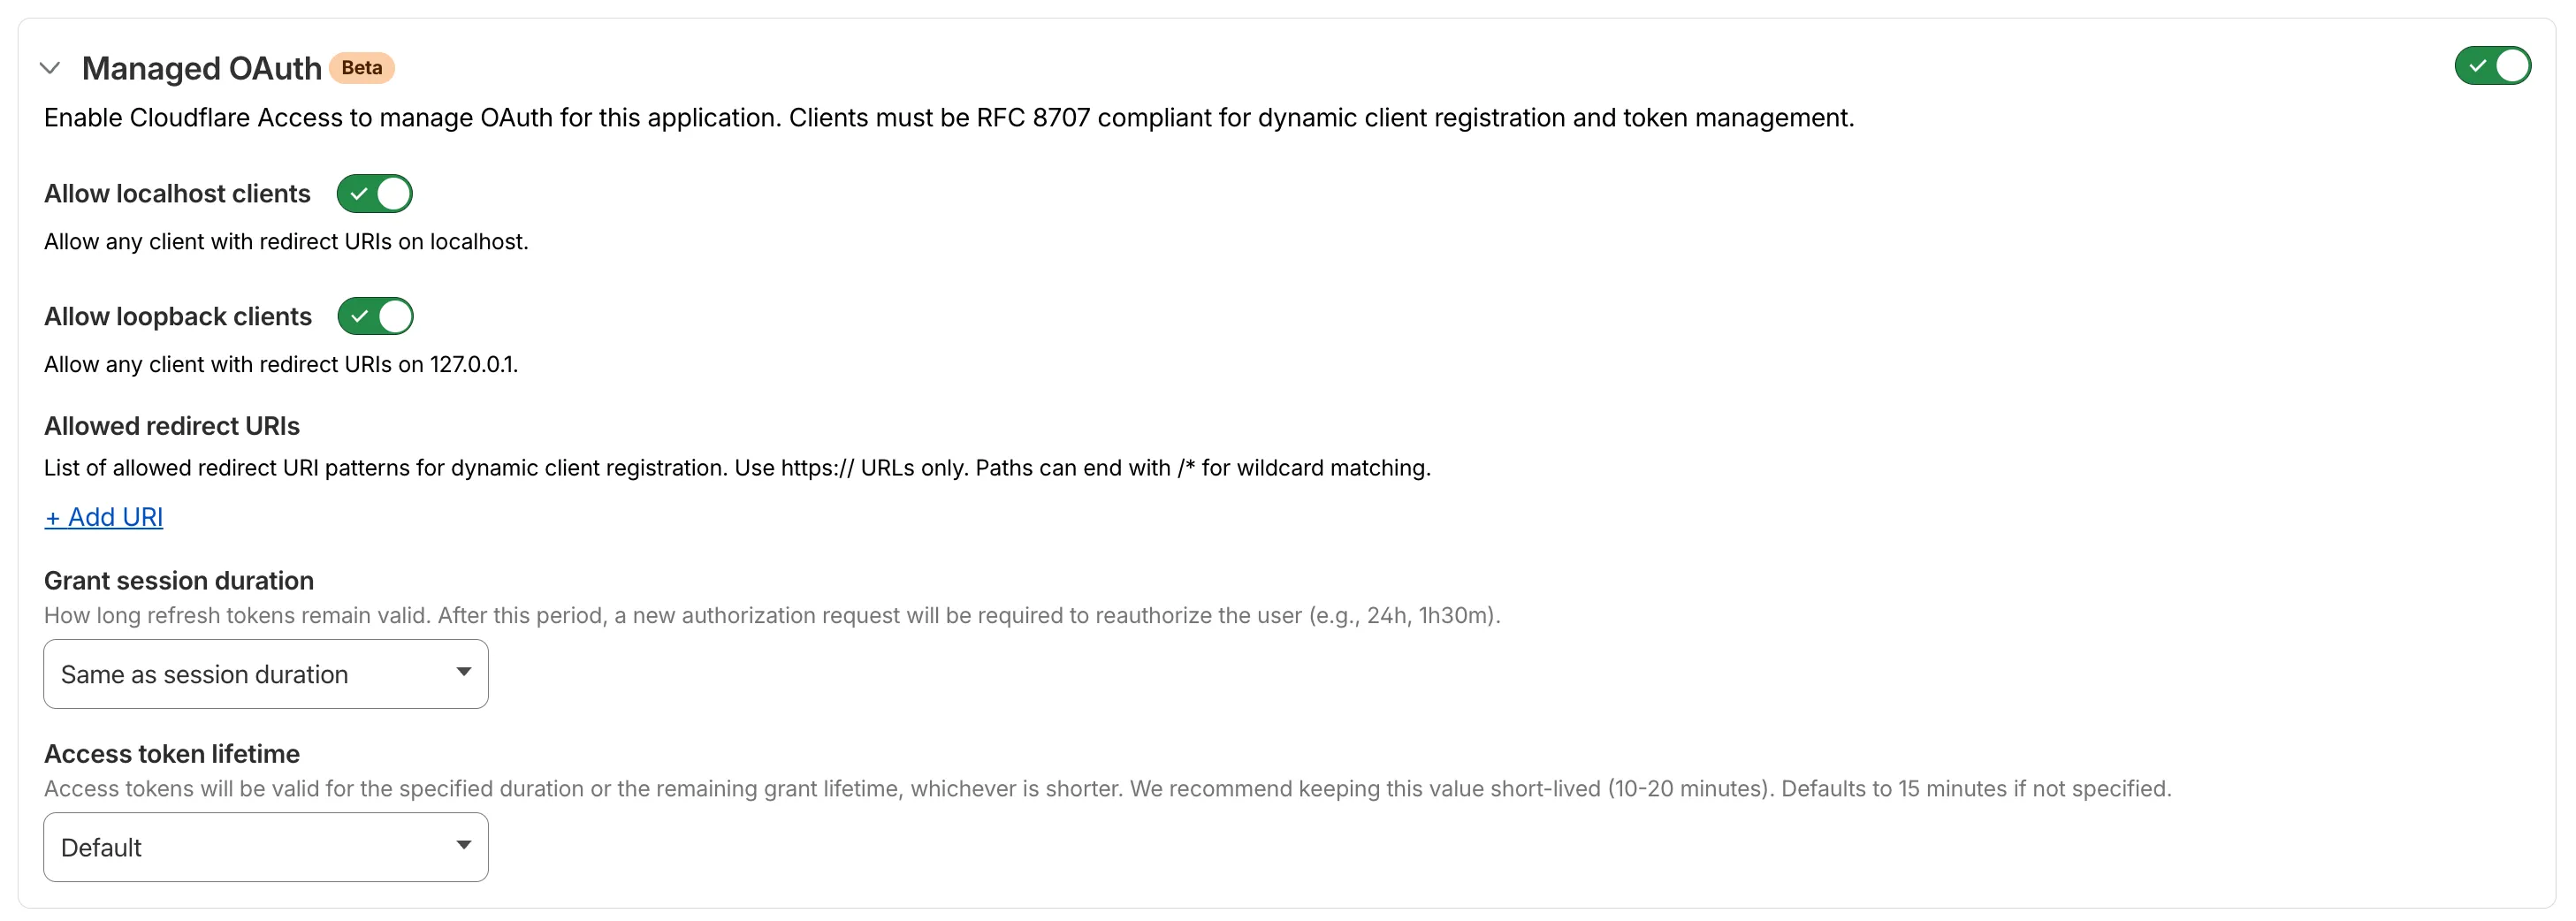
Cloudflare Access supports managed OAuth, which allows non-browser clients — such as CLIs, AI agents, SDKs, and scripts — to authenticate with Access-protected applications using a standard OAuth 2.0 authorization code flow.
Previously, non-browser clients that attempted to access a protected application received a 302 redirect to a login page they could not complete. The established workaround was cloudflared access curl, which required installing additional tooling.
With managed OAuth, clients instead receive a 401 response with a WWW-Authenticate header that points to Access's OAuth discovery endpoints (RFC 8414 ↗ and RFC 9728 ↗). The client opens the end user's browser to the Access login page. The end user authenticates with their identity provider, and the client receives an OAuth access token for subsequent requests.
Access enforces the same policies as a browser login; the OAuth layer is a new transport mechanism, not a separate authentication path.
Managed OAuth can be enabled on any self-hosted Access application or MCP server portal. It is opt-in for existing applications to avoid interfering with those that run their own OAuth servers and rely on their own WWW-Authenticate headers.
To enable managed OAuth, go to Zero Trust > Access controls > Applications, edit the application, and turn on Managed OAuth under Advanced settings.
You can also enable it via the API by setting oauth_configuration.enabled to true on the Access applications endpoint.
When Gateway routing is turned on, portal traffic appears in your Gateway HTTP logs. You can create Gateway HTTP policies with DLP profiles to detect and block sensitive data sent to upstream MCP servers.
To enable Gateway routing, go to Access controls > AI controls, edit the portal, and turn on Route traffic through Cloudflare Gateway under Basic information.
DNS Analytics is now available for customers with Customer Metadata Boundary (CMB) set to EU. Query your DNS analytics data while keeping metadata stored in the EU region.
This update includes:
DNS Analytics — Access the same DNS analytics experience for zones in CMB=EU accounts.
EU data residency — Analytics data is stored and queried from the EU region, meeting data localization requirements.
DNS Firewall Analytics — DNS Firewall analytics is now supported for CMB=EU customers.
Availability
Available to customers with the Data Localization Suite who have Customer Metadata Boundary configured for the EU region.
Where to find it
Authoritative DNS: In the Cloudflare dashboard, select your zone and go to the Analytics page.

In the Cloudflare One dashboard, the overview page for a specific Cloudflare Tunnel now shows all replicas of that tunnel and supports streaming logs from multiple replicas at once.
Previously, you could only stream logs from one replica at a time. With this update:
Replicas on the tunnel overview — All active replicas for the selected tunnel now appear on that tunnel's overview page under Connectors. Select any replica to stream its logs.
Multi-connector log streaming — Stream logs from multiple replicas simultaneously, making it easier to correlate events across your infrastructure during debugging or incident response. To try it out, log in to Cloudflare One ↗ and go to Networks > Connectors > Cloudflare Tunnels. Select View logs next to the tunnel you want to monitor.