In AI Search, you can upload files to an instance, or connect a data source such as an R2 bucket, to make your content searchable with natural language. Each file becomes an item identified by an object key (its filename or path). The list items endpoint returns the items in an instance.
That endpoint now accepts a key query parameter, so you can look up a single item by its exact object key without paging through the full list. This complements the existing item_id filter for when you know the key but not the ID.
Keys are unique per data source, so combine key with source (for example, source=builtin) to disambiguate when the same key exists across multiple sources.
Workers AI Markdown conversion (toMarkdown) now supports .gif and .bmp image files, in addition to the JPEG, PNG, WebP, and SVG formats already supported.
GIF and BMP files run through the same image pipeline as other formats. Each image is resized if needed (and for animated GIFs, only the first frame is used), then passed to an object-detection model to identify what it contains. Those detected objects prompt a vision model that writes a natural-language description of the image, which becomes searchable, machine-readable Markdown.
AI Search uses toMarkdown automatically to process the files it ingests, so any .gif and .bmp files are included the next time your index syncs, with no configuration changes required. This helps when your content mixes formats, for example a support knowledge base full of screenshots or an archive of BMP scans.
When you connect a data source to your AI Search instance, AI Search runs sync jobs to keep your index up to date with your content. You can now manage those jobs directly from Wrangler.
For example, you can trigger a sync job from your CI/CD or automated pipelines with the jobs create command so your index refreshes when you push a change:
wrangler ai-search jobs create my-instance
This creates an asynchronous sync job that checks for changes in your data source, and sends new, modified, or deleted files to be indexed.
The following commands are available:
Command
Description
wrangler ai-search jobs create
Trigger a new sync job
wrangler ai-search jobs list
List sync jobs for an instance
wrangler ai-search jobs get
Get details for a job
wrangler ai-search jobs cancel
Cancel a running job
wrangler ai-search jobs logs
View log entries for a job
All commands accept --namespace/-n (defaults to default) and --json for structured output that automation and AI agents can parse directly. The list and logs commands also support --page and --per-page for pagination, and cancel prompts for confirmation unless you pass -y/--force.
AI Search now gives you more control over similarity cache freshness. Similarity cache helps reduce latency and inference cost by reusing responses for semantically similar queries.
With these updates, you can choose how long responses are eligible for reuse and clear cached responses when they may be stale.
Cache duration now defaults to 48 hours
Previously, AI Search cached responses for a fixed duration of 30 days. Cached responses now use the instance's cache_ttl setting, and the default is 48 hours.
You can set cache_ttl when creating or updating an instance to choose a cache duration from 10 minutes to 6 days.
Use a shorter TTL when your source content changes frequently and freshness is more important. Use a longer TTL when your content is stable and you want more cache reuse.
For example, set cache_ttl to 518400 to retain cached responses for 6 days:
{ "cache_ttl": 518400}
Purge cached responses
You can also purge all cached responses for an instance on demand. Purging cached responses does not delete indexed content or source files.
It prevents AI Search from reusing previous cached responses, so subsequent similar queries generate fresh answers and repopulate the cache.
curl -X POST "https://api.cloudflare.com/client/v4/accounts/$ACCOUNT_ID/ai-search/instances/$INSTANCE_NAME/purge_cache" \
  -H "Authorization: Bearer $CLOUDFLARE_API_TOKEN"
You can also purge cached responses from the instance settings page in the Cloudflare dashboard.
Refer to similarity cache for the full list of supported cache_ttl values and more details about cache behavior.
New AI Search instances created after today will work differently. New instances come with built-in storage and a vector index, so you can upload a file, have it indexed immediately, and search it right away.
Additionally new Workers Bindings are now available to use with AI Search. The new namespace binding lets you create and manage instances at runtime, and cross-instance search API lets you query across multiple instances in one call.
Built-in storage and vector index
All new instances now comes with built-in storage which allows you to upload files directly to it using the Items API or the dashboard. No R2 buckets to set up, no external data sources to connect first.
const instance = env.AI_SEARCH.get("my-instance");// upload and wait for indexing to completeconst item = await instance.items.uploadAndPoll("faq.md", content);// search immediately after indexingconst results = await instance.search({ messages: [{ role: "user", content: "onboarding guide" }],});
Namespace binding
The new ai_search_namespaces binding replaces the previous env.AI.autorag() API provided through the AI binding. It gives your Worker access to all instances within a namespace and lets you create, update, and delete instances at runtime without redeploying.
Within the new AI Search binding, you now have access to a Search and Chat API on the namespace level. Pass an array of instance IDs and get one ranked list of results back.
AI Search now supports hybrid search and relevance boosting, giving you more control over how results are found and ranked.
Hybrid search
Hybrid search combines vector (semantic) search with BM25 keyword search in a single query. Vector search finds chunks with similar meaning, even when the exact words differ. Keyword search matches chunks that contain your query terms exactly. When you enable hybrid search, both run in parallel and the results are fused into a single ranked list.
You can configure the tokenizer (porter for natural language, trigram for code), keyword match mode (and for precision, or for recall), and fusion method (rrf or max) per instance:
Relevance boosting lets you nudge search rankings based on document metadata. For example, you can prioritize recent documents by boosting on timestamp, or surface high-priority content by boosting on a custom metadata field like priority.
Configure up to 3 boost fields per instance or override them per request:
AI Search now supports CSS content selectors for website data sources. You can now define which parts of a crawled page are extracted and indexed by specifying CSS selectors paired with URL glob patterns.
Content selectors solve the problem of indexing only relevant content while ignoring navigation, sidebars, footers, and other boilerplate. When a page URL matches a glob pattern, only elements matching the corresponding CSS selector are extracted and converted to Markdown for indexing.
Configure content selectors via the dashboard or API:
AI Search now supports four additional Workers AI models across text generation and embedding.
Text generation
Model
Context window (tokens)
@cf/zai-org/glm-4.7-flash
131,072
@cf/qwen/qwen3-30b-a3b-fp8
32,000
GLM-4.7-Flash is a lightweight model from Zhipu AI with a 131,072 token context window, suitable for long-document summarization and retrieval tasks. Qwen3-30B-A3B is a mixture-of-experts model from Alibaba that activates only 3 billion parameters per forward pass, keeping inference fast while maintaining strong response quality.
Embedding
Model
Vector dims
Input tokens
Metric
@cf/qwen/qwen3-embedding-0.6b
1,024
4,096
cosine
@cf/google/embeddinggemma-300m
768
512
cosine
Qwen3-Embedding-0.6B supports up to 4,096 input tokens, making it a good fit for indexing longer text chunks. EmbeddingGemma-300M from Google produces 768-dimension vectors and is optimized for low-latency embedding workloads.
All four models are available without additional provider keys since they run on Workers AI. Select them when creating or updating an AI Search instance in the dashboard or through the API.
For the full list of supported models, refer to Supported models.
AI Search supports a wrangler ai-search command namespace. Use it to manage instances from the command line.
The following commands are available:
Command
Description
wrangler ai-search create
Create a new instance with an interactive wizard
wrangler ai-search list
List all instances in your account
wrangler ai-search get
Get details of a specific instance
wrangler ai-search update
Update the configuration of an instance
wrangler ai-search delete
Delete an instance
wrangler ai-search search
Run a search query against an instance
wrangler ai-search stats
Get usage statistics for an instance
The create command guides you through setup, choosing a name, source type (r2 or web), and data source. You can also pass all options as flags for non-interactive use:
AI Search now offers new REST API endpoints for search and chat that use an OpenAI compatible format. This means you can use the familiar messages array structure that works with existing OpenAI SDKs and tools. The messages array also lets you pass previous messages within a session, so the model can maintain context across multiple turns.
Endpoint
Path
Chat Completions
POST /accounts/{account_id}/ai-search/instances/{name}/chat/completions
Search
POST /accounts/{account_id}/ai-search/instances/{name}/search
Here is an example request to the Chat Completions endpoint using the new messages array format:
curl https://api.cloudflare.com/client/v4/accounts/{ACCOUNT_ID}/ai-search/instances/{NAME}/chat/completions \
  -H "Content-Type: application/json" \
  -H "Authorization: Bearer {API_TOKEN}" \
  -d '{
    "messages": [
      {
        "role": "system",
        "content": "You are a helpful documentation assistant."
      },
      {
        "role": "user",
        "content": "How do I get started?"
      }
    ]
  }'
If you are using the previous AutoRAG API endpoints (/autorag/rags/), we recommend migrating to the new endpoints. The previous AutoRAG API endpoints will continue to be fully supported.
Select your instance, and turn on Public Endpoint in Settings.
For more details, refer to Public endpoint configuration.
UI snippets
UI snippets are pre-built search and chat components you can embed in your website. Visit search.ai.cloudflare.com ↗ to configure and preview components for your AI Search instance.
AI Search now supports custom metadata filtering, allowing you to define your own metadata fields and filter search results based on attributes like category, version, or any custom field you define.
Define a custom metadata schema
You can define up to 5 custom metadata fields per AI Search instance. Each field has a name and data type (text, number, or boolean):
Get your content updates into AI Search faster and avoid a full rescan when you do not need it.
Reindex individual files without a full sync
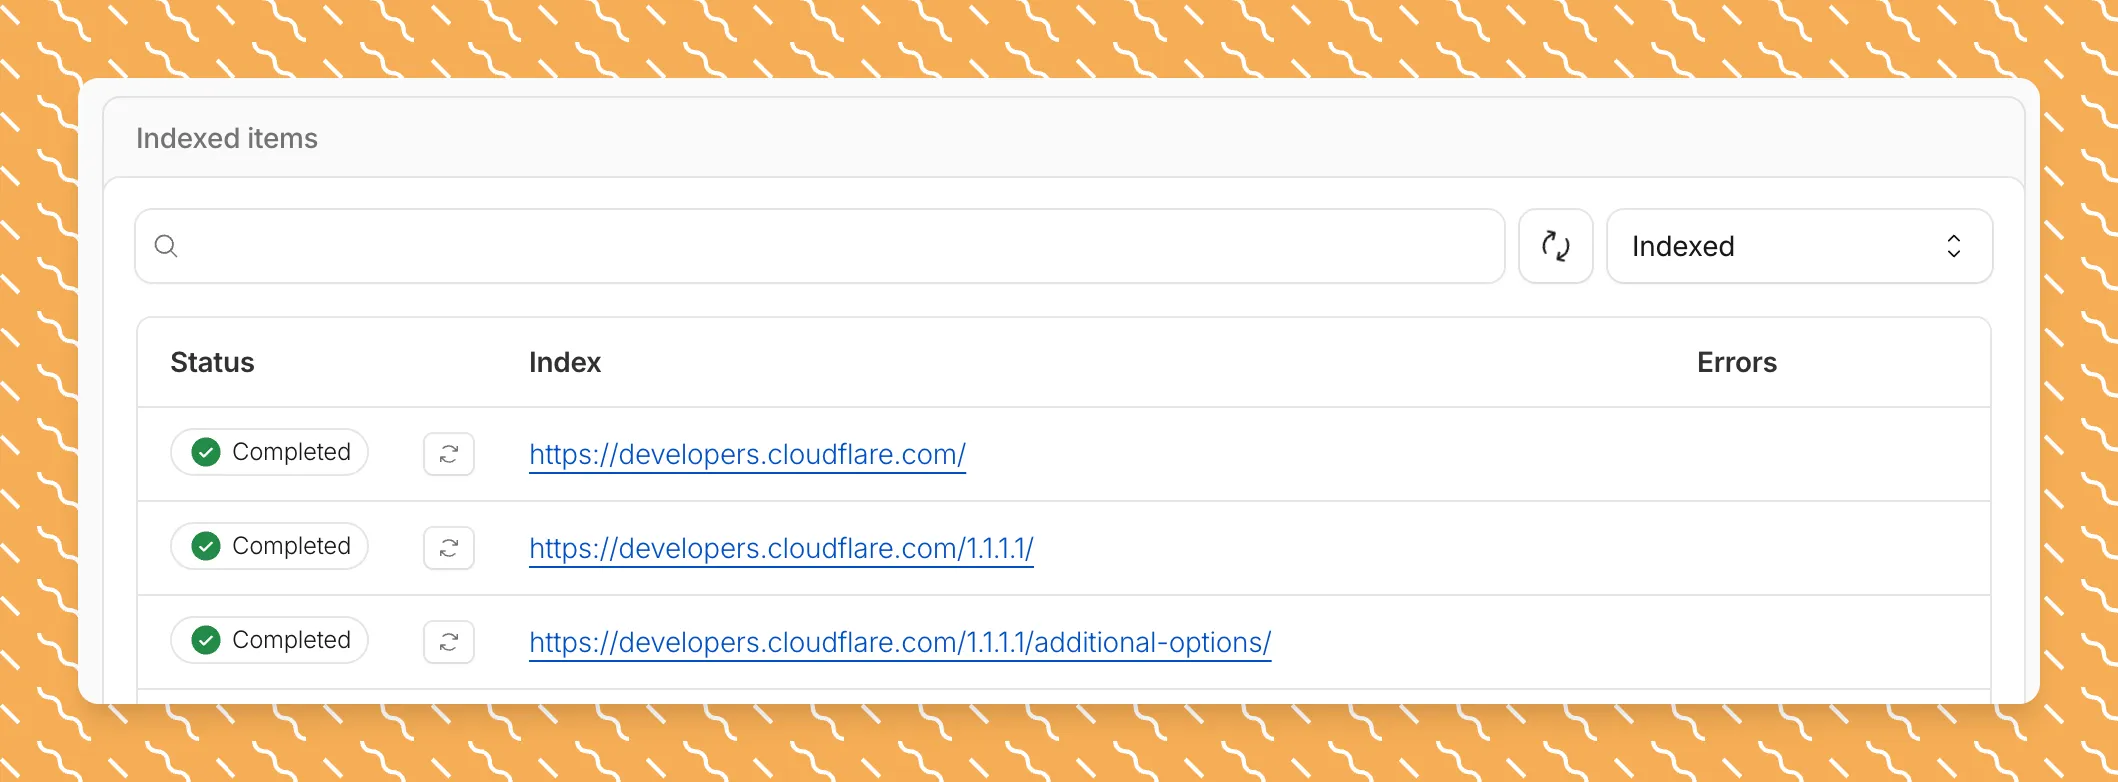
Updated a file or need to retry one that errored? When you know exactly which file changed, you can now reindex it directly instead of rescanning your entire data source.
Go to Overview > Indexed Items and select the sync icon next to any file to reindex it immediately.
Crawl only the sitemap you need
By default, AI Search crawls all sitemaps listed in your robots.txt, up to the maximum files per index limit. If your site has multiple sitemaps but you only want to index a specific set, you can now specify a single sitemap URL to limit what the crawler visits.
For example, if your robots.txt lists both blog-sitemap.xml and docs-sitemap.xml, you can specify just https://example.com/docs-sitemap.xml to index only your documentation.
Configure your selection anytime in Settings > Parsing options > Specific sitemaps, then trigger a sync to apply the changes.
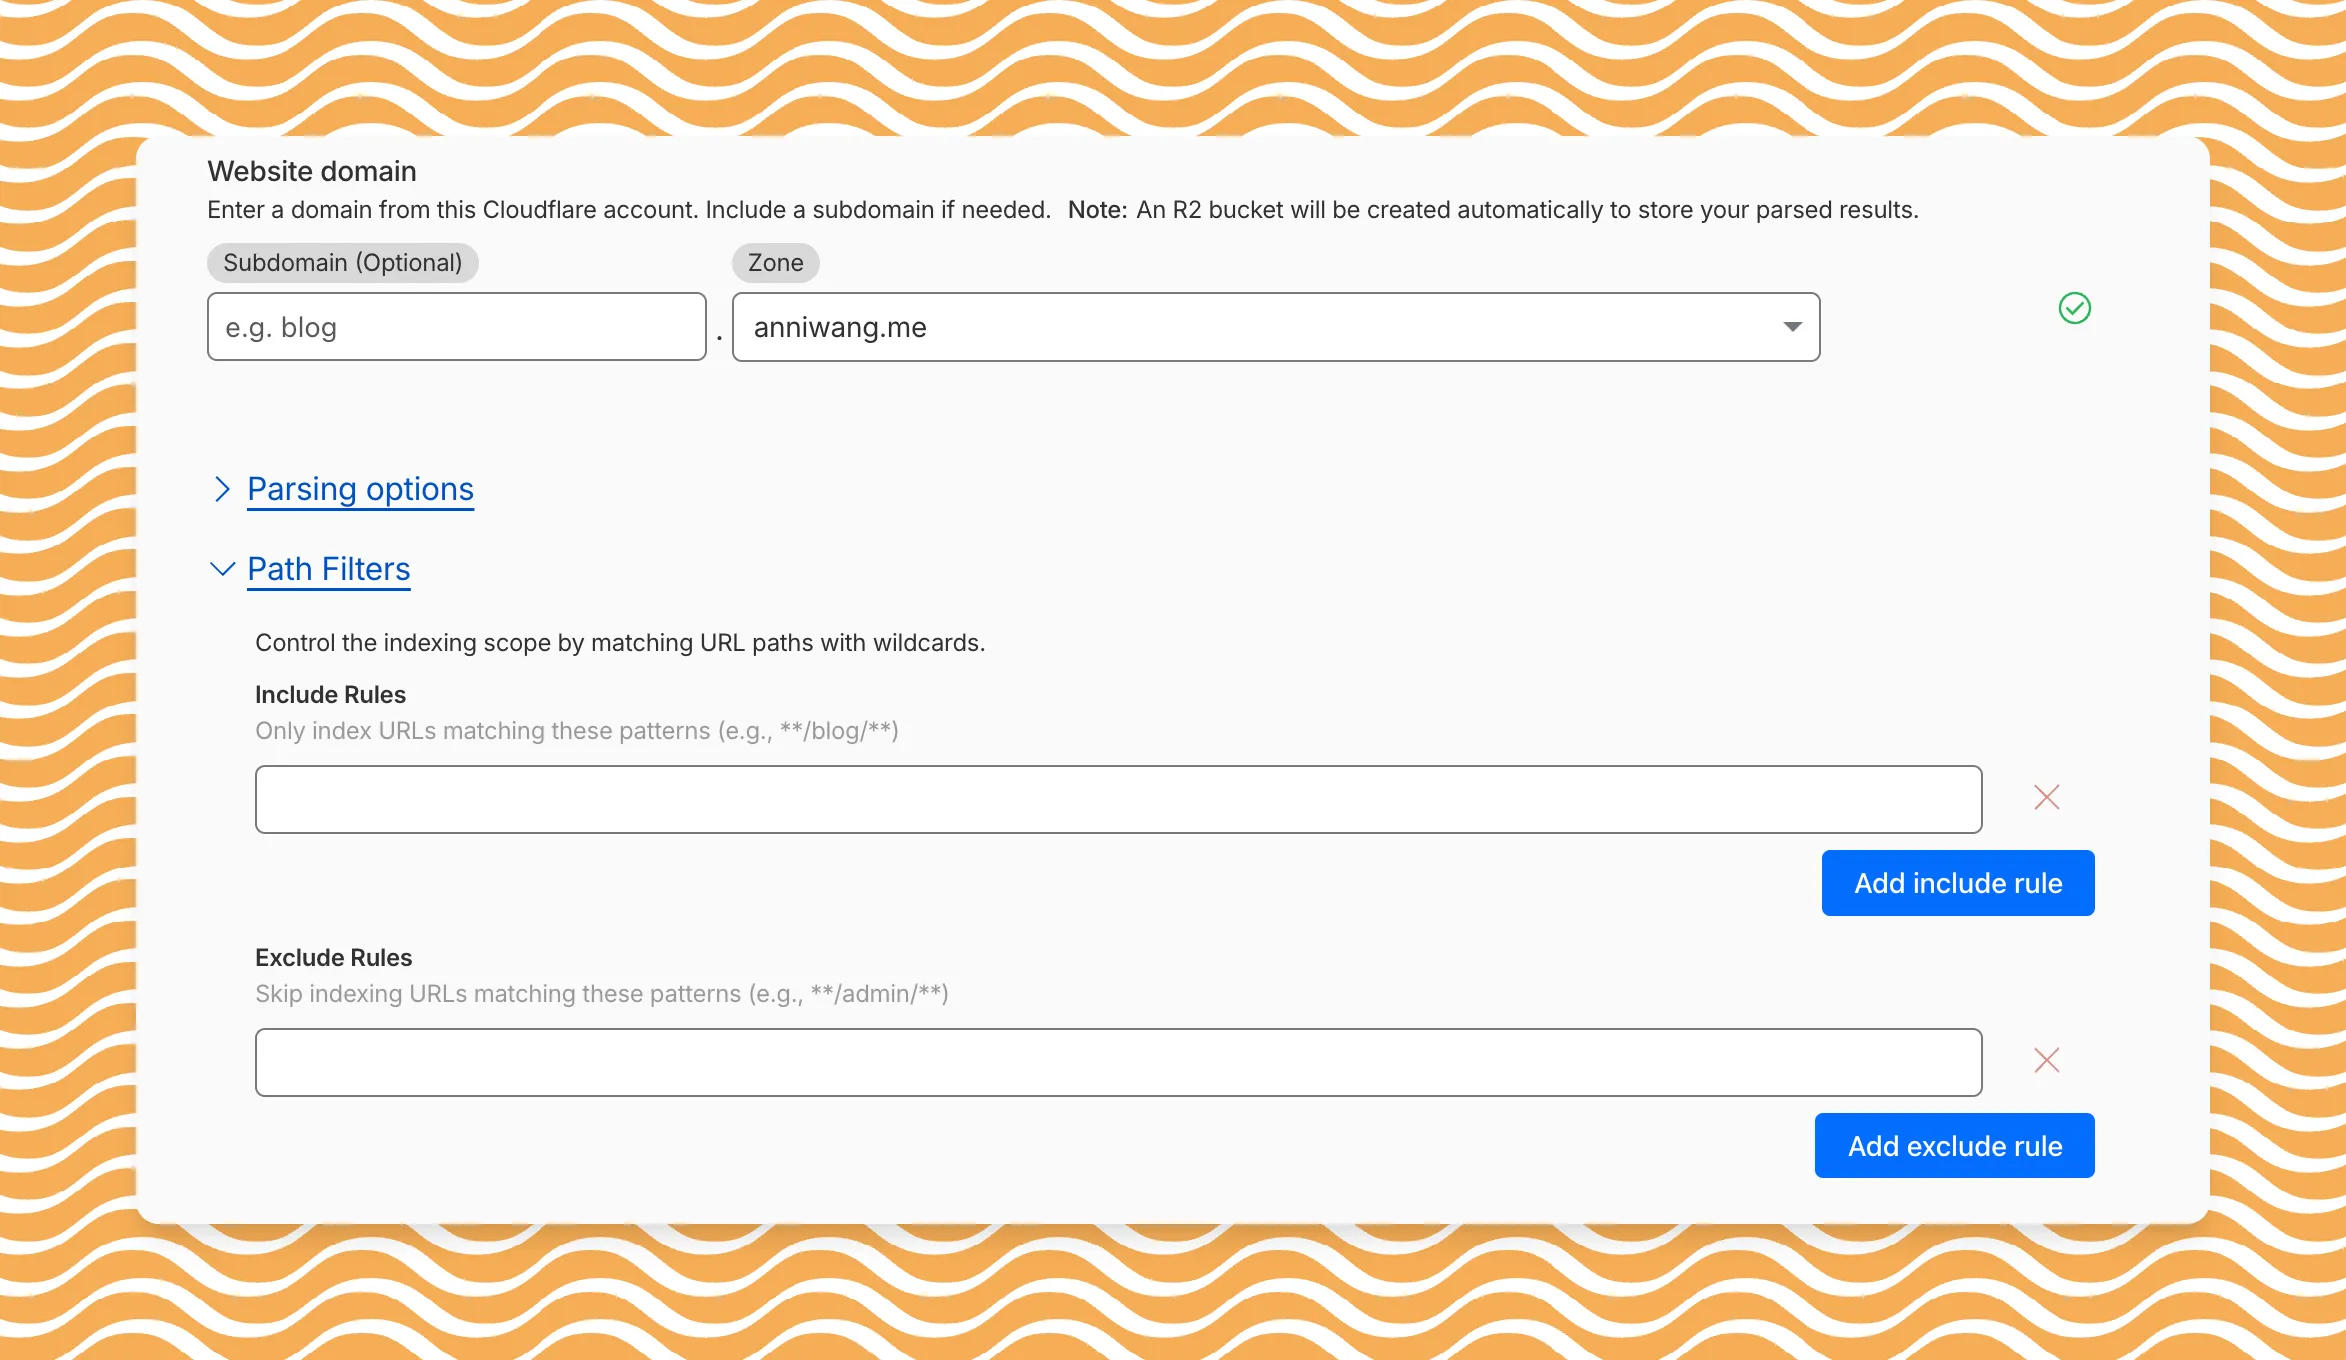
AI Search now includes path filtering for both website and R2 data sources. You can now control which content gets indexed by defining include and exclude rules for paths.
By controlling what gets indexed, you can improve the relevance and quality of your search results. You can also use path filtering to split a single data source across multiple AI Search instances for specialized search experiences.
Path filtering uses micromatch ↗ patterns, so you can use * to match within a directory and ** to match across directories.
Use case
Include
Exclude
Index docs but skip drafts
**/docs/**
**/docs/drafts/**
Keep admin pages out of results
—
**/admin/**
Index only English content
**/en/**
—
Configure path filters when creating a new instance or update them anytime from Settings. Check out path filtering to learn more.
You can now create AI Search instances programmatically using the API. For example, use the API to create instances for each customer in a multi-tenant application or manage AI Search alongside your other infrastructure.
If you have created an AI Search instance via the dashboard before, you already have a service API token registered and can start creating instances programmatically right away. If not, follow the API guide to set up your first instance.
For example, you can now create separate search instances for each language on your website:
for lang in en fr es de; do curl -X POST "https://api.cloudflare.com/client/v4/accounts/$ACCOUNT_ID/ai-search/instances" \ -H "Authorization: Bearer $API_TOKEN" \ -H "Content-Type: application/json" \ --data '{ "id": "docs-'"$lang"'", "type": "web-crawler", "source": "example.com", "source_params": { "path_include": ["**/'"$lang"'/**"] } }'done
AI Search now supports custom HTTP headers for website crawling, solving a common problem where valuable content behind authentication or access controls could not be indexed.
Previously, AI Search could only crawl publicly accessible pages, leaving knowledge bases, documentation, and other protected content out of your search results. With custom headers support, you can now include authentication credentials that allow the crawler to access this protected content.
This is particularly useful for indexing content like:
Internal documentation behind corporate login systems
Premium content that requires users to provide access to unlock
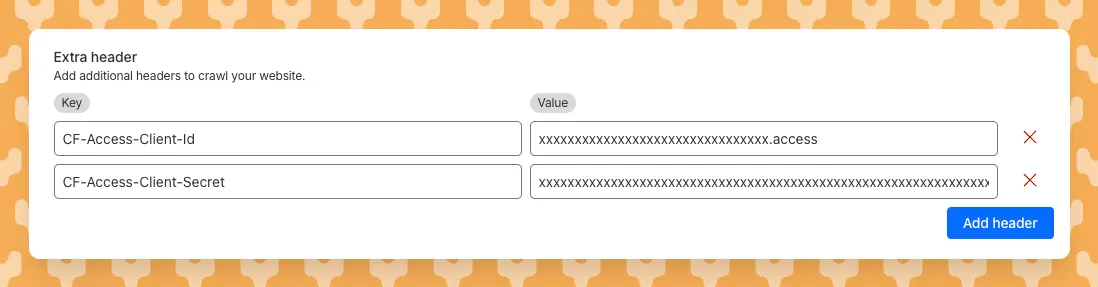
Sites protected by Cloudflare Access using service tokens
To add custom headers when creating an AI Search instance, select Parse options. In the Extra headers section, you can add up to five custom headers per Website data source.
For example, to crawl a site protected by Cloudflare Access, you can add service token credentials as custom headers:
AI Search now supports reranking for improved retrieval quality and allows you to set the system prompt directly in your API requests.
Rerank for more relevant results
You can now enable reranking to reorder retrieved documents based on their semantic relevance to the user’s query. Reranking helps improve accuracy, especially for large or noisy datasets where vector similarity alone may not produce the optimal ordering.
You can enable and configure reranking in the dashboard or directly in your API requests:
const answer = await env.AI.autorag("my-autorag").aiSearch({ query: "How do I train a llama to deliver coffee?", model: "@cf/meta/llama-3.3-70b-instruct-fp8-fast", reranking: { enabled: true, model: "@cf/baai/bge-reranker-base", },});
Set system prompts in API
Previously, system prompts could only be configured in the dashboard. You can now define them directly in your API requests, giving you per-query control over behavior. For example:
// Dynamically set query and system prompt in AI Searchasync function getAnswer(query, tone) { const systemPrompt = `You are a ${tone} assistant.`; const response = await env.AI.autorag("my-autorag").aiSearch({ query: query, system_prompt: systemPrompt, }); return response;}// Example usageconst query = "What is Cloudflare?";const tone = "friendly";const answer = await getAnswer(query, tone);console.log(answer);
AutoRAG is now AI Search! The new name marks a new and bigger mission: to make world-class search infrastructure available to every developer and business.
With AI Search you can now use models from different providers like OpenAI and Anthropic. By attaching your provider keys to the AI Gateway linked to your AI Search instance, you can use many more models for both embedding and inference.
In Provider Keys, choose your provider, click Add, and enter the key.
Connect a gateway to AI Search: When creating a new AI Search, select the AI Gateway with your provider keys. For an existing AI Search, go to Settings and switch to a gateway that has your keys under Resources.
Select models: Embedding models are only available to be changed when creating a new AI Search. Generation model can be selected when creating a new AI Search and can be changed at any time in Settings.
Once configured, your AI Search instance will be able to reference models available through your AI Gateway when making a /ai-search request:
export default { async fetch(request, env) { // Query your AI Search instance with a natural language question to an OpenAI model const result = await env.AI.autorag("my-ai-search").aiSearch({ query: "What's new for Cloudflare Birthday Week?", model: "openai/gpt-5" }); // Return only the generated answer as plain text return new Response(result.response, { headers: { "Content-Type": "text/plain" }, }); },};
In the coming weeks we will also roll out updates to align the APIs with the new name. The existing APIs will continue to be supported for the time being. Stay tuned to the AI Search Changelog and Discord ↗ for more updates!
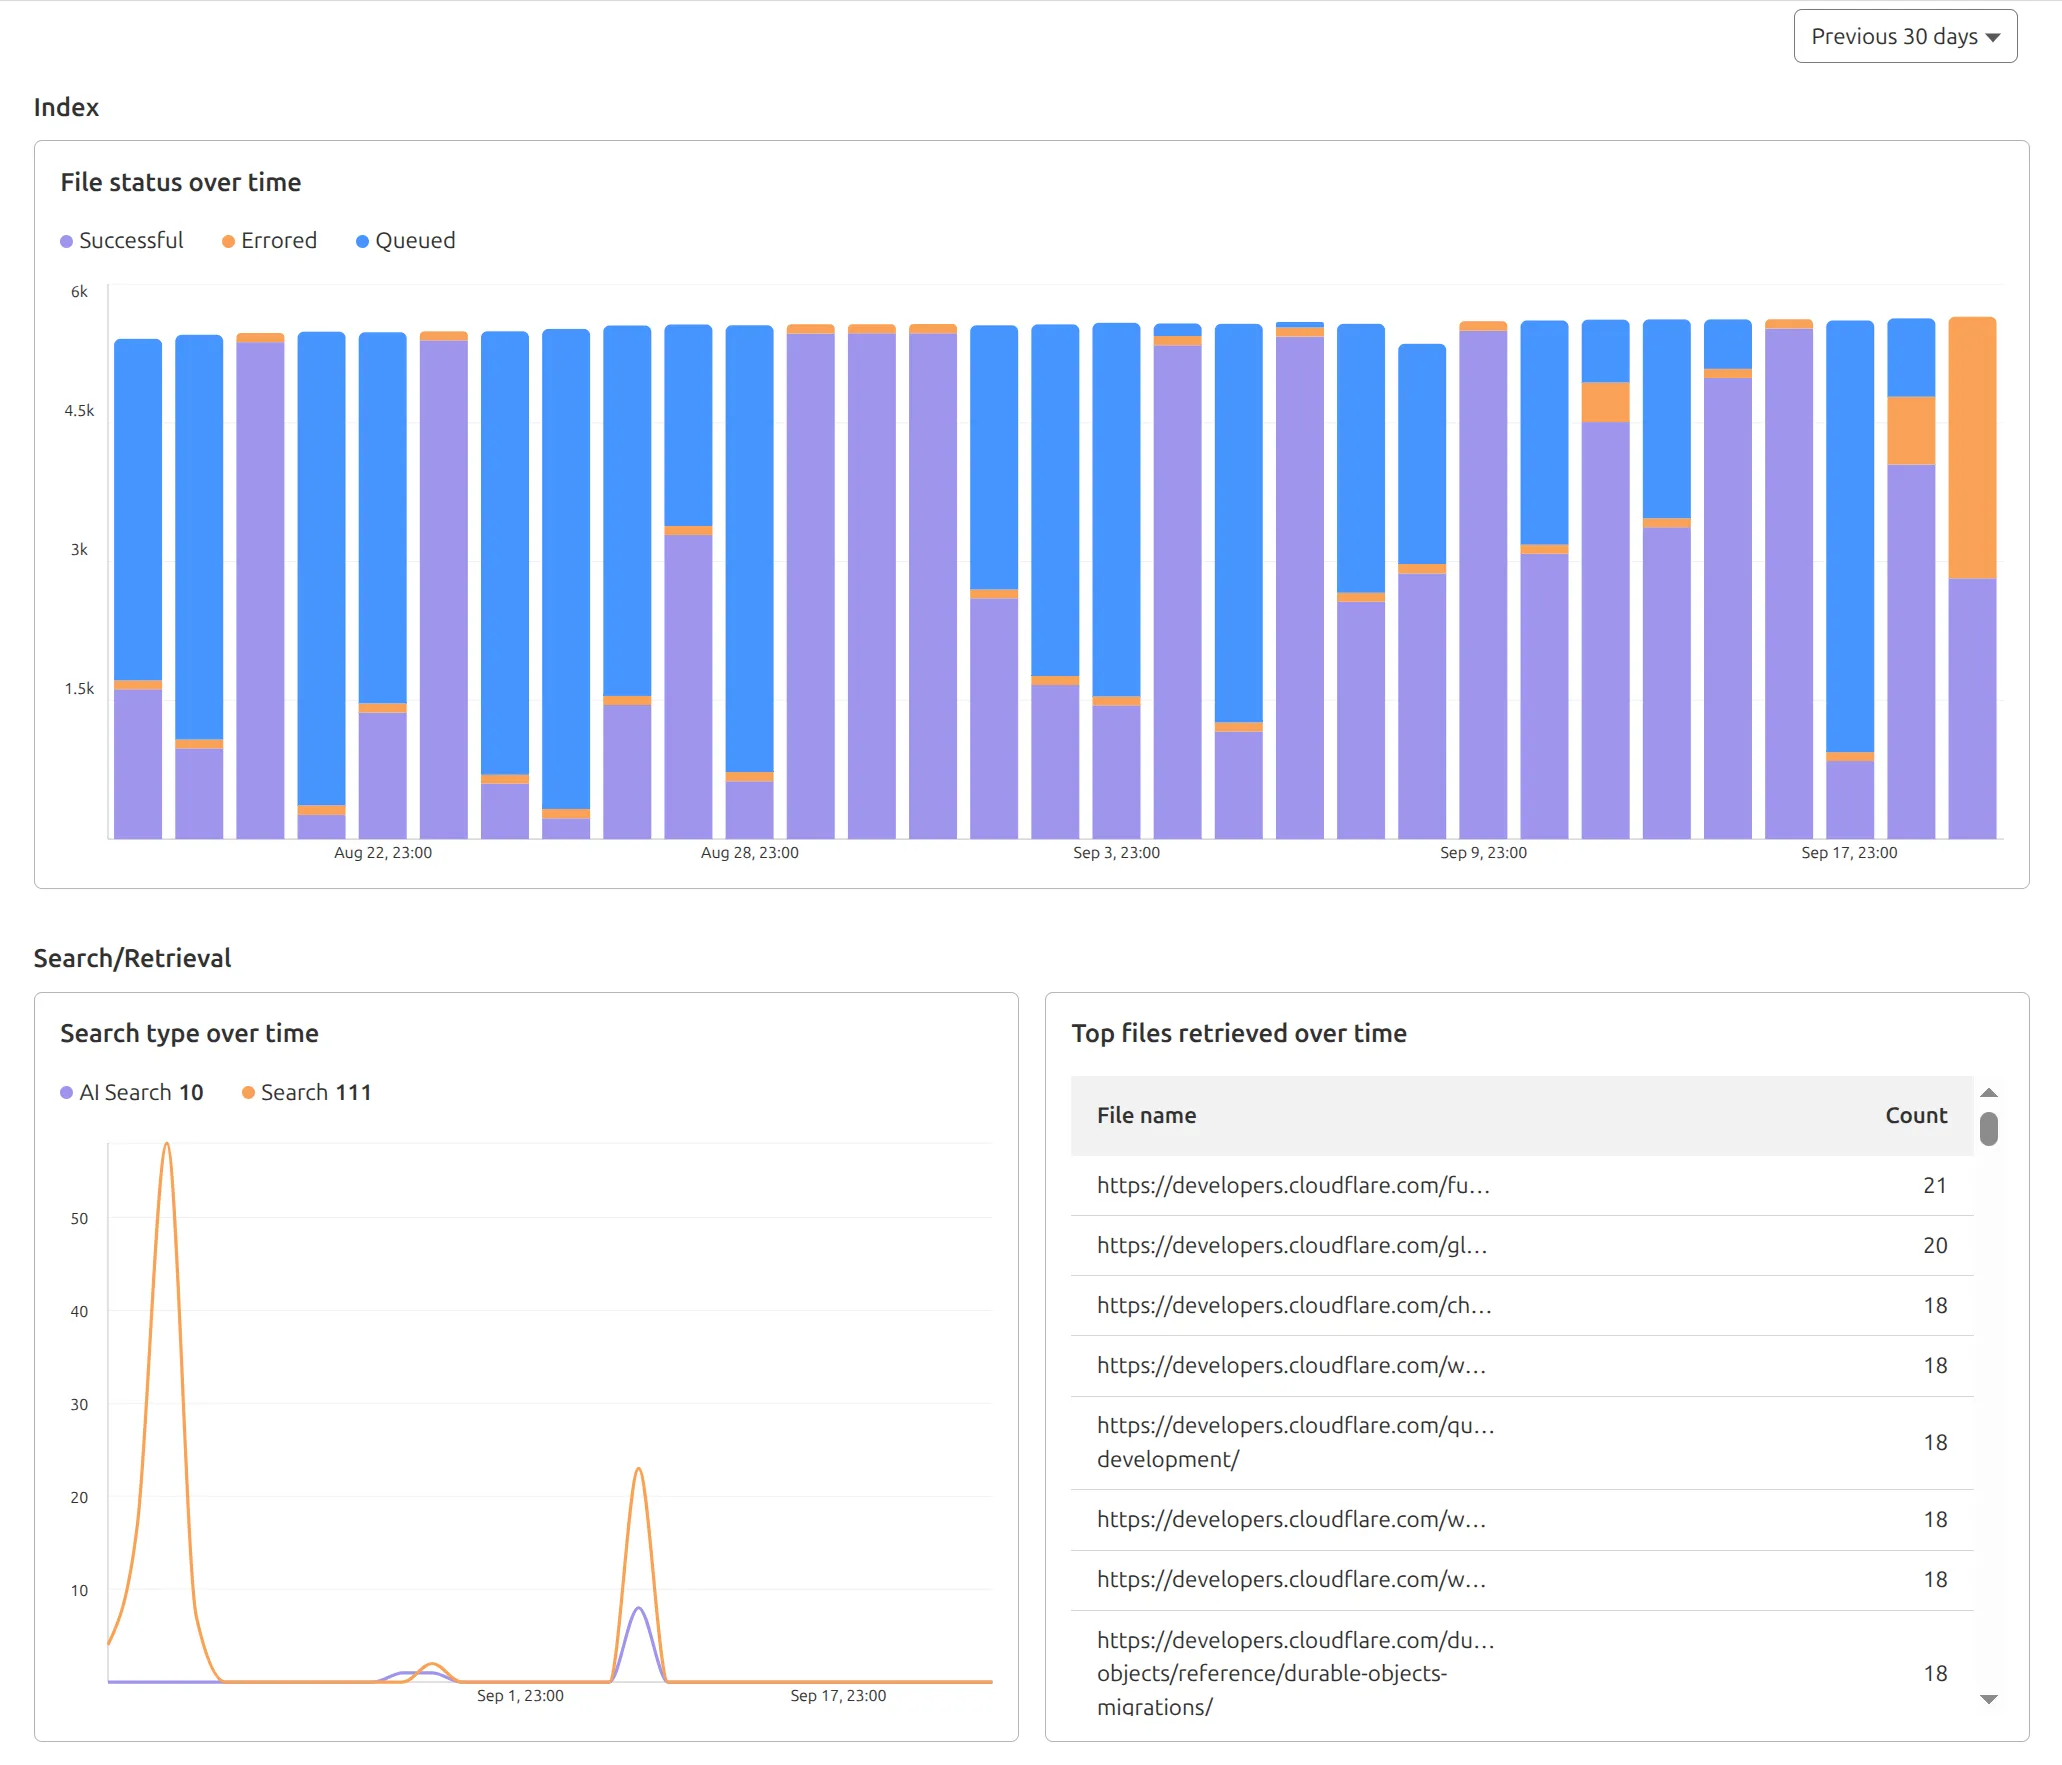
AutoRAG now includes a Metrics tab that shows how your data is indexed and searched. Get a clear view of the health of your indexing pipeline, compare usage between ai-search and search, and see which files are retrieved most often.
You can find these metrics within each AutoRAG instance:
Indexing: Track how files are ingested and see status changes over time.
Search breakdown: Compare usage between ai-search and search endpoints.
Top file retrievals: Identify which files are most frequently retrieved in a given period.
You can now expect 3-5× faster indexing in AutoRAG, and with it, a brand new Jobs view to help you monitor indexing progress.
With each AutoRAG, indexing jobs are automatically triggered to sync your data source (i.e. R2 bucket) with your Vectorize index, ensuring new or updated files are reflected in your query results. You can also trigger jobs manually via the Sync API or by clicking “Sync index” in the dashboard.
With the new jobs observability, you can now:
View the status, job ID, source, start time, duration and last sync time for each indexing job
Inspect real-time logs of job events (e.g. Starting indexing data source...)
See a history of past indexing jobs under the Jobs tab of your AutoRAG
This makes it easier to understand what’s happening behind the scenes.
Coming soon: We’re adding APIs to programmatically check indexing status, making it even easier to integrate AutoRAG into your workflows.
In AutoRAG, you can now view your object's custom metadata in the response from /search and /ai-search, and optionally add a context field in the custom metadata of an object to provide additional guidance for AI-generated answers.
You can add custom metadata to an object when uploading it to your R2 bucket.
Object's custom metadata in search responses
When you run a search, AutoRAG now returns any custom metadata associated with the object. This metadata appears in the response inside attributes then file , and can be used for downstream processing.
For example, the attributes section of your search response may look like:
{ "attributes": { "timestamp": 1750001460000, "folder": "docs/", "filename": "launch-checklist.md", "file": { "url": "https://wiki.company.com/docs/launch-checklist", "context": "A checklist for internal launch readiness, including legal, engineering, and marketing steps." } }}
Add a context field to guide LLM answers
When you include a custom metadata field named context, AutoRAG attaches that value to each chunk of the file. When you run an /ai-search query, this context is passed to the LLM and can be used as additional input when generating an answer.
We recommend using the context field to describe supplemental information you want the LLM to consider, such as a summary of the document or a source URL. If you have several different metadata attributes, you can join them together however you choose within the context string.
For example:
{ "context": "summary: 'Checklist for internal product launch readiness, including legal, engineering, and marketing steps.'; url: 'https://wiki.company.com/docs/launch-checklist'"}
This gives you more control over how your content is interpreted, without requiring you to modify the original contents of the file.
In AutoRAG, you can now filter by an object's file name using the filename attribute, giving you more control over which files are searched for a given query.
This is useful when your application has already determined which files should be searched. For example, you might query a PostgreSQL database to get a list of files a user has access to based on their permissions, and then use that list to limit what AutoRAG retrieves.
For example, your search query may look like:
const response = await env.AI.autorag("my-autorag").search({ query: "what is the project deadline?", filters: { type: "eq", key: "filename", value: "project-alpha-roadmap.md", },});
This allows you to connect your application logic with AutoRAG's retrieval process, making it easy to control what gets searched without needing to reindex or modify your data.
You can now filter AutoRAG search results by folder and timestamp using metadata filtering to narrow down the scope of your query.
This makes it easy to build multitenant experiences where each user can only access their own data. By organizing your content into per-tenant folders and applying a folder filter at query time, you ensure that each tenant retrieves only their own documents.
const response = await env.AI.autorag("my-autorag").search({ query: "When did I sign my agreement contract?", filters: { type: "eq", key: "folder", value: "customer-a/contracts/", },});
You can use metadata filtering by creating a new AutoRAG or reindexing existing data. To reindex all content in an existing AutoRAG, update any chunking setting and select Sync index. Metadata filtering is available for all data indexed on or after April 21, 2025.
AutoRAG is now in open beta, making it easy for you to build fully-managed retrieval-augmented generation (RAG) pipelines without managing infrastructure. Just upload your docs to R2, and AutoRAG handles the rest: embeddings, indexing, retrieval, and response generation via API.
With AutoRAG, you can:
Customize your pipeline: Choose from Workers AI models, configure chunking strategies, edit system prompts, and more.
Instant setup: AutoRAG provisions everything you need from Vectorize, AI gateway, to pipeline logic for you, so you can go from zero to a working RAG pipeline in seconds.
Keep your index fresh: AutoRAG continuously syncs your index with your data source to ensure responses stay accurate and up to date.
Ask questions: Query your data and receive grounded responses via a Workers binding or API.
Whether you're building internal tools, AI-powered search, or a support assistant, AutoRAG gets you from idea to deployment in minutes.
Get started in the Cloudflare dashboard ↗ or check out the guide for instructions on how to build your RAG pipeline today.